Adding Information to Forms
 The Edit Form page is used to configure your forms. It is displayed when you choose to modify a form in the Forms Page. There are two parts to a form's definition: the form's Settings, that control who can view the form and when the form is displayed, and the Form Entry definitions contained in the Form Builder, that define what information is displayed on the form, how that information is displayed, and whether your users can interact with the fields in the entries. This topic explains the Form Entry definitions - Defining Forms explains the Setting definitions.
When you first go to add or edit a form, you will be defaulted to the Form Builder tab. Here, you can add the field entries and customize the format of each entry by defining style attributes for the entry. You can choose from many different types of entries to populate your forms - all of which are explained below. As with all objects, you will use the control icons to add, modify, and delete Form Entries.
When you add an entry or click on the pencil icon to edit an existing entry, you will be led to an entry format that is controlled by the form settings for the page you are on. If the Form setting is set to Basic, you will be on a page where you can set each of the required items to add the field. If the Form setting is set to Visual, you will have a visual representation of what the page will look like on the left side of your screen and a field creation area for drag and drop building on the right side of the screen. The functions of the entry fields are the same in basic and in visual. In basic you will have all the fields on one page. You will save your changes and need to go view the form in order to see your changes. In Visual, the field definitions are on one tab and the style definitions are on a separate tab. Once you drag and drop your field definitions, you will see what the page will look like in the representation on the left side of your screen.
Header/Title can be used as the label for a field, the header for a column of fields, or to simply display text on the form - a section title or instructions, for example. This field is limited to 255 characters including spaces.
Entry Types.
Entry Type determines what this row will display. The type that you select will determine the other settings you will need to complete in order to successfully add the item.
You can choose from many different entry types to either display information stored in your database fields or collect information to be stored in those fields. Here are detailed explanations for each entry type:
![]() value - Displays the current value of a field. There must be a field that has been completed and saved to have data to show as a value. Examples might be displaying a student name or document id number on multiple pages of a document
value - Displays the current value of a field. There must be a field that has been completed and saved to have data to show as a value. Examples might be displaying a student name or document id number on multiple pages of a document
![]() field - Collects information from the user. The field may be a text box, a selection list, a check box, or any other object that the user can interact with in order to set or select a value. That is set when you created the field.
field - Collects information from the user. The field may be a text box, a selection list, a check box, or any other object that the user can interact with in order to set or select a value. That is set when you created the field.
|

|
Before you can use fields in your form, you must have fields to choose from. If you haven't added any fields to your database, the only choices you'll have are the built-in fields. See Using Fields for information on setting up your fields.
|
 filter score - Displays the result of a calculation filter. Filters can be used to calculate scoring rubrics, total grant budgets, or to perform other operations on stored data.
|
|
Before you can use filter scores in your form, you must have filters to choose from. If you haven't added any calculation filters to your database, this selection will not function. See Using Filters for information on setting up your filters.
|
html – allows for a longer text field that the Title Only Selection as well as indicates the use of HTML. You can use HTML in the header/title of other entry types but you can be limited by the number of characters you may use.
hidden field - Use hidden field entries to save constant information - information that is the same for every document. If you intend to store applications indefinitely, add a hidden field that identifies the year or the cycle during which the application was submitted. This value could allow you to screen lists to show only documents active in the current cycle or easily track information from one cycle to the next. Set the Edit Control to Read/Write for a hidden field.
|

|
When you use a hidden field, you must define a Default Value and the form that contains the field must be saved at some point in order for the field's value to be saved. Select a page that has fields you know will be saved at some point. A general information page is a good choice.
|
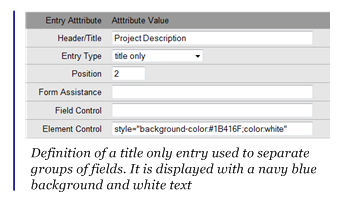
![]() title only - displays the text that you enter.This field is defaulted to bold but you can change the styles once the entry has been created.
title only - displays the text that you enter.This field is defaulted to bold but you can change the styles once the entry has been created.
![]() contributor - Collects the contact information for a Contributor field with special coding that also displays status information about contributor notification and participation.
contributor - Collects the contact information for a Contributor field with special coding that also displays status information about contributor notification and participation.
![]() conditional field - An entry that is only displayed if the Source Field has a Parent Field that has a value or if the selected Conditional Field has a value that matches the Condition Value. Use conditional fields to collect information that is applicable when a specific value has been set in another field. For example, you could configure a set of fields that only appears when a check box is checked. When you use a conditional field in a table the Parent Field is always the Conditional Field and the Conditional Field setting must not be set. You can still, however, enter a value in Condition Value - if you don't, then any value will satisfy the condition.
conditional field - An entry that is only displayed if the Source Field has a Parent Field that has a value or if the selected Conditional Field has a value that matches the Condition Value. Use conditional fields to collect information that is applicable when a specific value has been set in another field. For example, you could configure a set of fields that only appears when a check box is checked. When you use a conditional field in a table the Parent Field is always the Conditional Field and the Conditional Field setting must not be set. You can still, however, enter a value in Condition Value - if you don't, then any value will satisfy the condition.
![]() multi-access field - Multi-access field entries can contain the values entered by multiple users in one Source Field. You can use multi-access fields in review scoring forms to collect the scores from all of the reviewers.
multi-access field - Multi-access field entries can contain the values entered by multiple users in one Source Field. You can use multi-access fields in review scoring forms to collect the scores from all of the reviewers.
|

|
Users who will be entering values in multi-access fields can only have ModifyInfo permission for the associated access level(s). If they also have QueryInfo permission, they will see the values entered by other users when they first access the form, making it appear as though they had already completed the form.
|
Tables
In some cases you may need to collect the same type of information more than once. You may want a student to enter their employment history or a teacher to provide budget details for a proposed project. Rather than creating separate fields for Employer1, Employer2, etc. you can arrange one group of fields in a table. Each field is displayed in a column and each row contains one group of fields. The Header/Title value becomes the column header. You can also specify the number of rows to be displayed. Working with tables is currently most effective in Basic. We are working to improve the visual workspace for tables
|
|
The fields that you use in a table must have parent/child relationships in order to properly group the field values in rows.
When you use repeating fields in a table or a list (see Repeating Values below), one set of values - one complete row in the case of a table - is sufficient to satisfy the Required rule for the fields. You can ensure that ample room is provided for applicants who have many entries to make without forcing all applicants to complete the entire table or list.
|
start columns - Use this entry before the field that will appear in the first column of your table to indicate the beginning of the table.
break columns - If you have too many columns to comfortably fit within the width of the form you can use this entry to break the table into sections. The field that follows this entry begins the next section.
end columns - Use this entry after the field that will appear in the last column of your table. When you close a repeating set of field with the end columns, you must set the repeat count to specify how many rows of fields to display.
Repeating Values
You can collect a list of values - a series of notes, for example - by enclosing a field with the following form entries. The user may make an entry and save. When the user returns to the page, a new field is available while maintaining the original field.
repeat start - Use this entry before the field.
|
|
The edit control for the field between these entry types must be set to Read Only Add.
|
repeat end - Use this entry after the field.
Other Entry Types.
save button - You can use this entry to insert a save button in your form - as a convenience to your users you could place a save button at the bottom of a long form.
document action - A special entry type that you can use to enable a user to change the state of the document after they have completed the required fields in their form and saved the values. This is useful for contributors or other users who have approval authority over a document.
Continuing to build.
After you select the Entry Type, additional settings are presented depending on the type selected.
Source Field/Source Filter - Whether you're displaying or collecting information, you must identify the data source for the field entry. In most cases that source will be a database field that you can select from the Source Field list; if you're displaying the results of a filter the Source Filter list is displayed.
Default Value – You can set a value that will default as the answer (example: you can default to a selected state if all your constituents are primarily in in one state) This setting is optional in all cases except hidden fields.
Edit Control - The entry types that collect information also allow you to control, or force, the user's interaction with the field.
![]() Read Only - The field is displayed but the value cannot be changed regardless of the user's permissions.
Read Only - The field is displayed but the value cannot be changed regardless of the user's permissions.
![]() Read/Write - The value is editable, if the user has the appropriate permissions, but the field is not mandatory. If this type of field is left empty in an application form and all required information is complete the form's status icon indicates that an optional field is empty.
Read/Write - The value is editable, if the user has the appropriate permissions, but the field is not mandatory. If this type of field is left empty in an application form and all required information is complete the form's status icon indicates that an optional field is empty.
![]() Required - If the user has permission to edit the field, a value must be set and the form will not be complete until a value is set.
Required - If the user has permission to edit the field, a value must be set and the form will not be complete until a value is set.
![]() Read Only-Add - After a value has been saved it cannot be modified but additional information may be added. You can use this control in comment fields that multiple users can access. One user cannot change another user's entry but can add their own.
Read Only-Add - After a value has been saved it cannot be modified but additional information may be added. You can use this control in comment fields that multiple users can access. One user cannot change another user's entry but can add their own.
![]() Contributor Complete - Available for Contributor fields only, choosing this setting will prevent the form from registering as complete until the target form assigned to the contributor has also been completed. This is useful to ensure that all recommendations, for example, have been completed before the applicant can submit an application.
Contributor Complete - Available for Contributor fields only, choosing this setting will prevent the form from registering as complete until the target form assigned to the contributor has also been completed. This is useful to ensure that all recommendations, for example, have been completed before the applicant can submit an application.
Position - sets the order of the Form Entries. Position only appears on the Basic form definition page. The Position is automatically set on the Visual (or drag and drop) form when you drag your entry where you want it located on the page. When you add a new entry in Basic, it will by default be the last item in the entry list and this value will be set automatically. You can insert a new entry into an existing entry list by entering a row number. You can also move an existing entry up or down in the list by changing this value.
Display Field Info - Fields, conditional fields, and multi-access fields can display information about the origins of the current value: the user name of the author and the date and time that the value was saved. When this option is selected the information is displayed above the field display.
Conditional Field/Conditional Value - In order for this field type to be displayed, it must be associated with a Conditional Field whose value can be met. If the Conditional Field contains a list of values you will be able to select one of those values (check box fields present Yes/No options). If the Conditional Field is a text field, enter the text that will satisfy the condition. Since text values can be abbreviated or misspelled, in almost all cases using a Conditional Field that has defined options in preferable to using a text field.
Form Assistance – The information you type in this field will appear as flyover text when the user holds their cursor over this field. It can provide more detailed information to clarify a field.
When you have completed all the entries for your field you can click the save button in basic or drag and drop your field to the page in visual and then click save.
Also see:
Using Fields
Using States
Setting User Permissions
Working with Filters